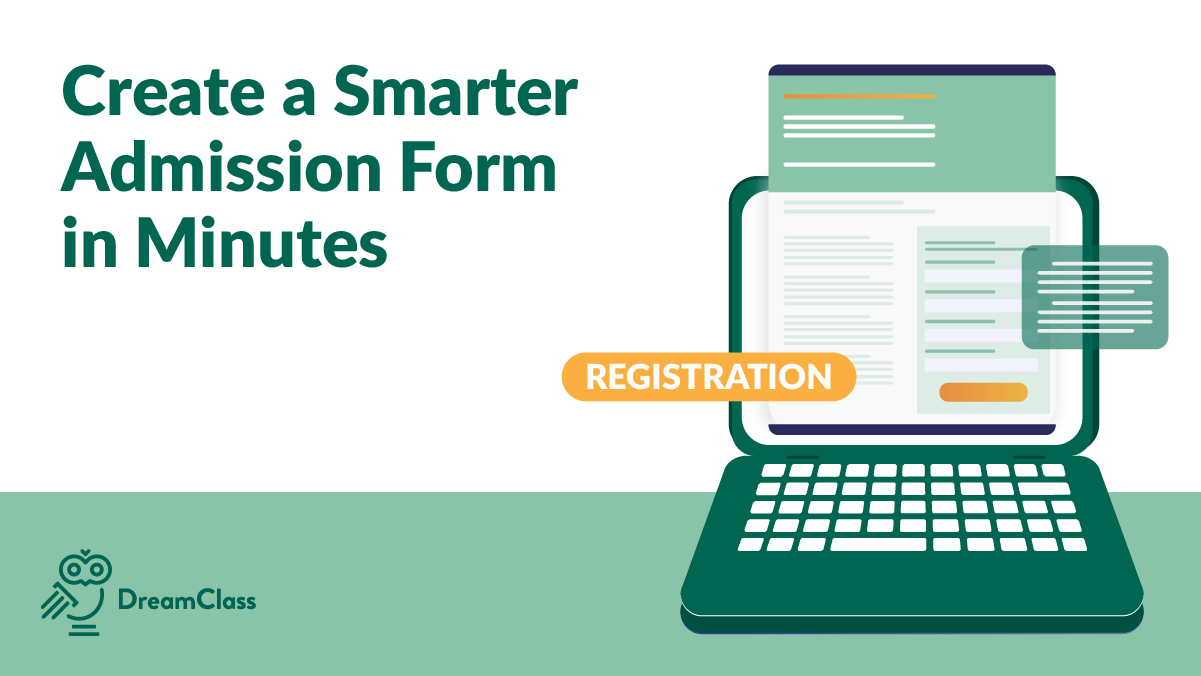
A student admission form is more than a sign-up sheet. It is the starting point of your entire enrollment workflow, from application review to student records, class placement, parent access, and long-term reporting.
In other words, the way you structure your form determines how clean your student data will be later. If you have ever re-typed information from PDFs, chased missing guardian details, or struggled to generate proper records, the issue usually starts at the form level.
DreamClass allows you to create a structured, digital student admission form that feeds directly into student profiles, guardian records, and enrollment workflows; so you set it up once and use the data everywhere.
Why Does Student Admission Form Structure Matter?
Before creating your form, it is important to understand one key principle: not all fields behave the same way.
Some fields simply collect information for that one submission. However, other fields connect directly to student or guardian profiles inside your system.
This distinction matters because:
- Connected fields automatically populate student records.
- Guardian fields create reusable parent profiles.
- Structured data supports transcripts, attendance, and reporting later.
If you run a private school, vocational school, or homeschool collective and want clean records you can print, share, or audit, your structure needs to be intentional from the beginning.
How to Create a Student Admission Form in DreamClass
Step 1: Create a New Public Admission Form
- Go to Admissions from the left-side menu.
- Select New Period Admission Form.
- Choose Public.
The form should be public because parents or students will access it from your website through a shared link.
- Name your form (for example: New Enrollment Form 2025–2026).
- Under Targeted to, select who will fill out the form:
- Select Guardian if a parent is completing it.
- Select Student if an adult student is completing it directly.
- Select Apply for Classes.
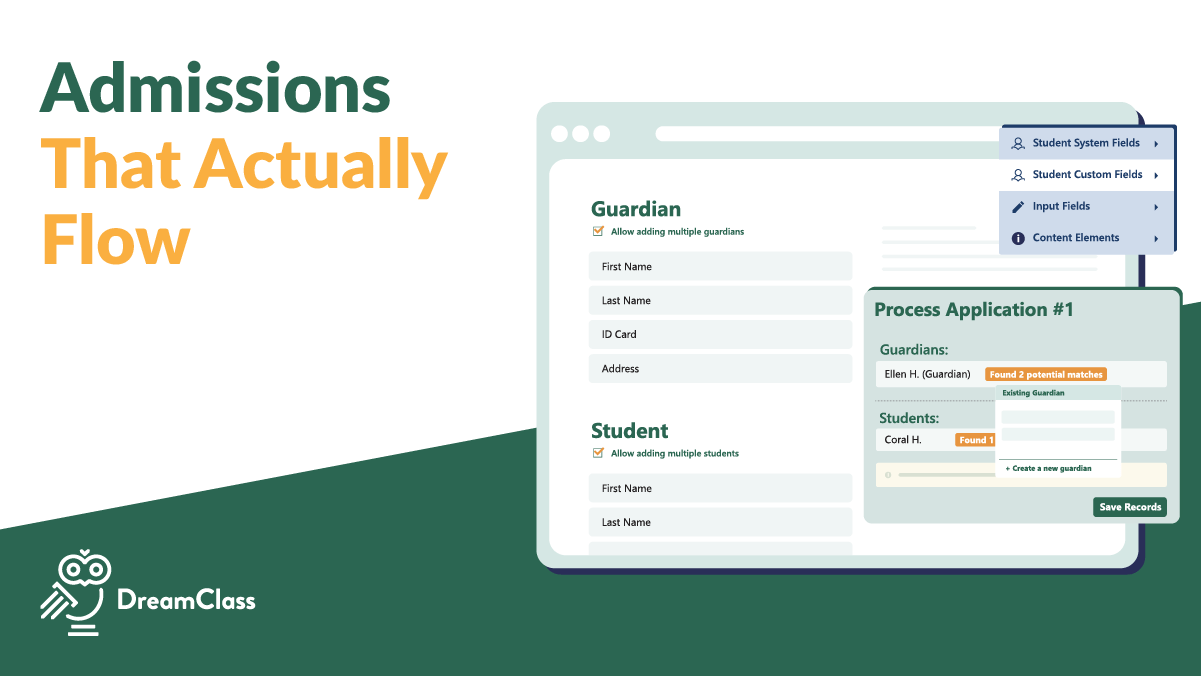
Step 2: Configure the Form Fields
When building your student admission form, you will add fields that collect information from the applicant.
It is important to understand that you can:
- Add simple form fields (information collected only for the submission), or
- Use existing student or guardian fields (information that connects directly to profiles inside DreamClass).
Whenever possible, select existing Student Fields or Guardian Fields so the data automatically transfers into the student and family records.
If you create a completely new custom field instead of selecting an existing profile field, that information will not automatically populate the student’s permanent record.
Step 3: Add Guardian and Student Information Correctly
If the form is targeted to guardians, the guardian will complete both:
- Their own information
- The student’s information
When adding guardian-related details (such as occupation, phone number, or address), make sure you select the appropriate Guardian Field.
This ensures:
- A reusable guardian profile is created
- Multiple students from the same family can be connected
- Parent portal access works correctly later
Step 4: Publish Your Student Admission Form
Once your fields are configured:
- Review the form.
- Save your changes.
- Publish the form.
After publishing, DreamClass generates a shareable public link.
You can:
- Add this link to your website
- Share it via email
- Include it in enrollment announcements
Parents or students can then complete the student admission form online.
Step 5: Review and Process Applications
Once submissions begin:
- Applications appear in your Admissions dashboard.
- You can review each submission.
- You can change application status (e.g., pending, approved, rejected).
When you approve an application:
- A student profile is created automatically.
- Guardian records are linked.
- The student can be assigned to classes.
▶️ Watch the video:
0:00 Hi there, this is Lida, and in this video we’re going to create your new admission forms for the new academic year together.
0:07 In DreamClass there is a menu called Admissions to the left, and I would like you to select New Period Admission Form, Public. The reason our form will be public, because we want to create an experience where your audience, parents or students, are going to go to your website, and they’re going to click
0:26 a link, and they’re going to start to fill out the form. That experience in DreamClass is called public. So for this video, you’re going to name your admission form, so that can be new enrollment form 2025 to 2026. Targeted, to here means that who is going to fill it out.
0:43 If it’s guardian, select guardian. If it’s adult student, select student, and the student will fill out directly the form. In this case, I’m going to select the guardian.
0:52 And please select Apply for Classes. I’m going to explain later on why, but essentially in DreamClass there’s a way for parents to request to go to second grade, and that matters because as soon as they select to go for second grade, once an admin approves that application, the student of the parent
1:15 is going to end up in that roster. That’s the reason. Now a notification received for email is the email of the registrar team or the team that is going to receive a notification as soon as a new submission is received.
1:30 If your school has fees, you can also connect a fee and enable a signature in case you would like the parents to sign the form.
1:39 Now that I’ve created the form, I can add a welcome message. The welcome message can be, something that you’re going to draft.
1:47 So welcome to my school. and you can add a quick introductory message for the parent. Now I’m going to select preview in this case because I’d like you to see how the form works.
1:59 Looks like before you change it. So welcome to my school is that introductory message. It has the section of the guardian.
2:08 This is called a section and this is called a field. In this case it’s called a relationship field. So mother, father, grandfather.
2:13 Let’s go back to the building of it though. Each section in DreamClass is, either already here. So for the guardian, you didn’t have to do anything.
2:24 This was already here. the student also is here so you just have to edit the fields and decide if let’s say the telephone is going to be required or not.
2:33 However, most of the schools would like to have a section where they will draft a contract. So for that video, I’m going to create a new section where I’m going to add policy and agreement.
2:51 Now in DreamClass, for now, a specific. So in this case, I’m going to add my, my terms and conditions and I want to scroll up so you can see where did that go.
3:03 Now going back to our form, this is how my terms look like. Now I can add a box called checkbox in DreamClass where I can either say to the parent I have read and understood.
3:19 So in this case I can say I have read and understood. So I’m creating a new form field as it’s called.
3:26 This field is a type of checkbox because the experience I’m looking for is, someone to say I have read and understood.
3:33 Now before I hit save I want to explain something here. When you create a new field, sometimes the field has to be just something that the parent is going to answer and it’s it’s just an acknowledgment so I don’t need every day in the future when I’m working with this family to know anything about that
3:54 field very much. Versus I need to know every time the name of a mom. In DreamClass there is an important distinction between a new field and an existing guardian field.
4:05 For example, in this case I’ve added my contract and I have this policy and agreement. However, what if I wanted to have a section for the guardian where I will add specific information about their occupation?
4:24 so in this case if you scroll up again the new section was created under the guardian section so if you’ve noticed the form has when it’s a guardian form it has the guardian first and all their related data and then the student So if I want to know every time when I pull up a family record such as the
4:43 blacks I can see in the personal information their names But what if I want to see in the exact same manner that I see their first name?
4:51 I want to see their occupation So in DreamClass this is an advanced clarification, but you need to know that This is called an existing custom field.
5:02 Existing custom field means that you didn’t select this button here and you created it here you went to the settings you went to custom fields and you went to add guardian field so if I want to know What is your daily job because I would like to have answer to that and I want to know every day what type
5:26 of job the parent is doing I have to create this as a guardian field and then the steps you need to follow is you need to go to this new enrollment form that we just built and I will go to the occupation section and I will add an existing field.
5:48 Please understand that there is an important distinction here. If you create important information as a simple form field, then once the parent ends up here, you will not have this connected with the response with this field.
6:03 So it’s a very important section. So let’s recap what we’ve seen in this video. We know how to create a new public form.
6:10 We know what the public form looks like. The public form is a, is a link which you can either give to, which you can either share with your community by just copying and pasting that link and sharing, sharing it with them or you can just add it on the website like many customers have done in DreamClass
6:29 . Adding it to the website means that you will create a link, you have a website, you have the link of DreamClass and somewhere, let’s say in your official website, you will select a button registration or enrollment and it will direct the user to fill out that form.
6:46 The DreamClass form consists of three main things, a section, a specific field and custom sections and custom fields. so for the student you don’t need to do anything else because the student information is already here but if let’s say you wanted to add a custom student section instead of you scroll
7:09 down and instead of adding a guardian section in this button you just select student custom section. When you do that, that’s very powerful so you can add medical information.
7:20 The students have different types of information so if you want to track a specific custom field, please follow the steps that I did before.
7:29 You need to create the field in the settings, custom fields. In this case, let’s say that I’m interested in medication.
7:40 So I can say please type all types of medications that we should provide to And type, you can say text or you can select long text.
8:02 In this case, I’m going to go for long text because I want to give the parent the option to provide a detailed answer.
8:10 So in this new medical section that I created, I’m going to connect my field and I’m going to make it a required field too because I want the parent to, I want the parent to have to answer this as a mandatory question.
8:26 Let’s see how that looks like. And just like that, we have a new box where the parent can type and submit it.
8:32 That’s all for this video. Please let me know if you have any questions about how to create your own form and I’ll be happy to assist.
8:41 Please reach out to support at DreamClass.io for any questions. Thank you for watching. Bye.
How Does This Fit Into Your Full Enrollment Workflow?
Once your student admission form is live:
- Applications appear in your admissions dashboard.
- You can review, change status, and track progress.
- Approved applications convert into official student profiles.
- Guardians receive access to their portal.
As a result, your form is not isolated — it connects directly to class management, attendance tracking, gradebooks, transcripts, and tuition management.
This structured approach reflects best practices in digital enrollment workflows, where application data flows seamlessly into institutional records, instead of living in disconnected files.
Ready to Simplify Your Admissions Process?
If you are currently:
- Chasing paper packets
- Copying data from spreadsheets
- Managing enrollment through email threads
Then it may be time to move your student admission form into a system built for growing schools.
DreamClass allows you to create, publish, track, and convert applications into official student records, all in one place.
You can start with a single form and expand as your school grows. Start your free trial and build your first admission form today. Or, if you prefer to see it in action first, book a short demo and walk through the workflow with our team.
Related Reads
- Why DreamClass Is the Best Admissions Software for Schools
- How Can School Management Software Streamline K-12 Admissions?
- Top Benefits of Implementing a School Information Management System (SIS)
- How to Build an Effective Enrollment Management System for Small Schools Without Adding More Admin Work
- DreamClass Case Studies: Schools That Transformed Operations with DreamClass
FAQ
Frequently Asked Questions
Can I use the same student admission form for multiple academic years?
Yes. However, it is recommended to create a new form for each academic period so applications remain clearly organized. This helps you track enrollment by year and avoid confusion when reviewing past submissions.
What happens after a student admission form is approved?
Once you approve an application, DreamClass automatically creates the student profile and links guardian records. You can then assign the student to classes and continue managing attendance, grades, and communication from one place.
Can guardians register multiple children with one form?
Yes. When you use proper guardian fields, the system creates a reusable guardian profile. As a result, families with multiple students can be connected under the same account.
Is a public student admission form secure?
Yes. Although the form is public for accessibility, submissions are securely stored inside your account. Only authorized administrators can review, approve, or modify applications.
Do I need technical expertise to set this up?
No. The form builder is designed for school leaders who do not have IT support. You select fields, publish the form, and start receiving applications, without coding or complex setup.