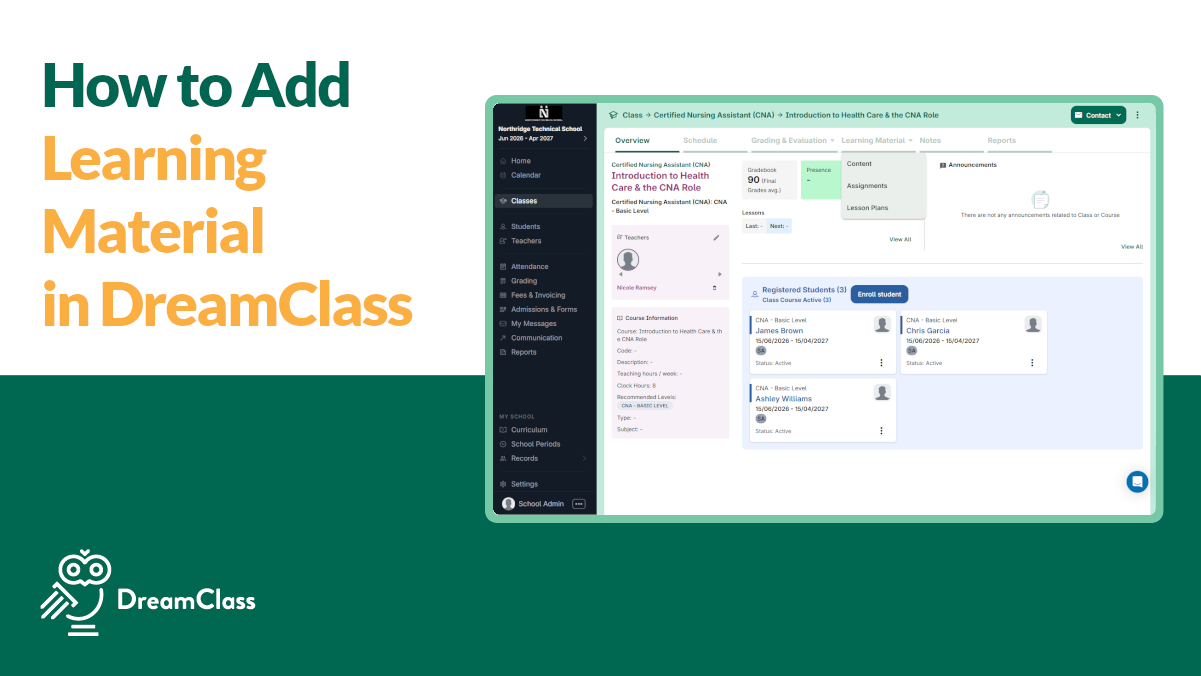
If you need to know how to add learning material in DreamClass, the process is simple. Open the class, select the course, go to Learning Material, upload your file, add a clear name and description, apply tags, and save. Once you set up a clean structure, teachers and admins can keep course content organized without chasing files across email threads, shared drives, or paper folders.
Why does learning material organization matter in DreamClass?
Learning material affects more than lesson delivery. It affects how quickly students find resources, how easily teachers update coursework, and how clearly admins support the learning process.
When files live in scattered folders, the result is usually the same. Students miss documents. Teachers resend the same file more than once. Admin teams lose track of which resource belongs to which class. By contrast, a clean setup inside DreamClass keeps everything closer to the course itself.
That matters across virtually all school types. For example, private schools want fewer moving parts. New school founders want a system that feels manageable. Homeschool groups want clarity without bureaucracy. And vocational teams want a more structured course experience, across instructors and cohorts.
In practical terms, a better setup helps you:
- Keep files tied to the right class and course
- Reduce repeated questions from students and families
- Make course resources easier to review and update
- Organize content with tags for faster filtering later
- Support a more professional learning experience
One customer review captures the value well:
SImple, easy, and affordable!
I like how easy it is to use and navigate. Clean interface and great functionality.
Director and OwnerEducation management
That matters because simple systems are the ones people actually keep updated.
What is learning material in DreamClass?
In DreamClass, learning material is the sum of course files and resources attached to a specific class course. These can include worksheets, readings, assignment briefs, presentations, and other teaching documents students need during the term.
The content is not floating in a general file library. Instead, it sits inside the course context, which makes the material easier to find and easier to manage.
What do you need before you add learning material in DreamClass?
Before you upload anything, make sure the class and course already exist in DreamClass. You should also have each file ready, together with the title and short description you want students or teachers to see.
If you already know how you want to sort material, plan your tags first. For example, you might organize by unit, week, assignment type, or required versus optional content. If you want a cleaner setup from the start, use class and course tagging in DreamClass to build a more consistent structure across courses.
That short planning step saves time later. More importantly, it prevents the LMS area from turning into a long, messy file list.
How do you add learning material in DreamClass step-by-step?
Here is the core process on how to add learning material in DreamClass.
1. How do you open the right class and course in DreamClass?
Go to Classes and select the class you want. Then open the relevant course.
This step places the material in the correct learning context from the beginning. Otherwise, even a useful file becomes harder to find.
2. How do you go to the Learning Material area?
Inside the course, open the Learning Material area.
This is the section where course files and supporting resources are managed for that specific course.
3. How do you add new course content?
Click the option to add new content.
At this point, DreamClass opens the entry form, where you upload the file and complete the supporting details.
4. How do you upload the file?
Choose the file you want to upload.
Most schools use this area for PDFs, worksheets, slides, reading handouts, assignment instructions, or similar course resources.
5. How do you name the material clearly?
Add a clear title and a short description.
This is where many teams either help themselves or trip themselves up. A label like “Document 1” tells nobody anything. A label like “Unit 2 Reading Guide or Week 4 Lab Instructions” makes the resource instantly usable.
6. How do you tag learning material in DreamClass?
If your tags already exist, add the right ones before saving.
Tags help you organize by topic, level, unit, format, or course need. As a result, teachers and students can find the right file faster, especially once a course starts building a real content library.
7. How do you save the learning material?
Click Save.
Once saved, the material appears inside the course and becomes part of the class resource flow.
8. How do you add more units or files later?
Repeat the same process for each new resource.
That flexibility is valuable, inasmuch as you don’t need to build the whole course library in one sitting. Instead, you can add content gradually, as the course grows.
▶️ Watch the video:
0:01 Let’s see how easy it is to add learning material to your courses. Go to classes, select the class you want and then the course.
0:10 Go to learning material and click to add content. Click the button. To upload the files you want. Add a name, add a description, upload your file and at this point you can also add your tags.
0:29 If you don’t have tags simply go to settings to create them. Push settings, go to school tags and go to learning material tags.
0:38 Create a group. And then add the tag. Now go back to the editing and click to add your tag. Then hit save.
0:59 Click on fur and this is how it looks like. At any moment you want, you can go ahead and add it.
1:07 Click the app or icon to add as many units as you wish.
How do you create learning material tags in DreamClass?
If you do not already have tags, DreamClass lets you create them in Settings.
Use this path:
Settings → School Tags → Learning Material Tags
Then follow this order:
- Create a tag group
- Add the tag or tags you want
- Return to the learning material entry
- Apply the new tag before saving
This is a small setup task, yet it has a big payoff. It also pairs well with academic management, especially when you want your material, grading flow and student progress to stay organized in one place.
A useful tag structure often includes:
- Subject area
- Term or grading period
- Unit or module
- File type
- Required versus optional material
Now, because the structure is flexible, it works for schools that want order without a rigid system.
What are the best practices for adding learning material in DreamClass?
Uploading a file is easy. Keeping the course usable, over time, is the real goal.
As your resource library grows, a few habits make a big difference. They also make it easier for teachers to manage classroom content without creating extra admin work.
- Use consistent naming: Start with the week, unit, or topic.
- Write short descriptions: Explain what the file is and when students should use it.
- Use tags consistently: Avoid overlapping labels that mean almost the same thing.
- Upload by course: Put each file where students expect to find it.
- Review old files regularly: Remove outdated content, so the course stays clean.
Another review reinforces the point:
Stellar Support and Product
The features are user friendly and easy to learn. The design of the app is intuitive, making it an efficient system in organizing a large amount of student information.
Assistant Program Director of Educational Support ServicesEducation management
The same benefit applies to course content. A clean structure saves time and cuts friction.
How does DreamClass support organized course content beyond file uploads?
DreamClass isn’t just a place to store documents. The Learning Material toolset sits inside a broader school management environment.
Because classes, student records, class schedules, portals, and academic tools already live inside the platform, your course content doesn’t have to sit in a disconnected system. Instead, the files stay close to the daily work for the course.
That setup is especially useful for schools that want one organized hub instead of several disconnected tools for class management, communication, records, and course content.
If you’re still comparing platforms, broader guides on school management software and student information systems provide helpful background.
Is adding learning material in DreamClass easy?
Yes. In most cases, it is one of those small workflows that pays off quickly.
Open the class, choose the course, upload the file, add a clear title, apply tags, and save. Then repeat the process as your course develops. For schools that want structure without extra complexity, this is a practical way to turn scattered files into a usable course library.
Ready to organize your course content?
If you want to stop chasing files and keep everything in one place, DreamClass gives you a simple way to do it.
Book a free demo to see how you can organize classes, materials and student progress, in one system.
Related Reads
FAQ
Frequently Asked Questions
How do you add learning material in DreamClass quickly?
To add learning material in DreamClass quickly, open the class, go to the course, select Learning Material, upload the file, add a name and description, apply tags, and save. Once your tag structure is in place, the workflow becomes even faster.
What files can you upload as learning material in DreamClass?
Most schools use the section for common course resources such as PDFs, presentations, worksheets, reading handouts, and assignment briefs. In short, if it supports teaching and belongs to the course, it fits naturally here.
How do tags improve learning material organization in DreamClass?
Tags group files by unit, topic, type, or priority. Therefore, students and teachers can find the right resource faster and avoid digging through long file lists.
Can teachers manage their own learning material in DreamClass?
Yes. Teachers can upload and maintain course resources for their classes. That reduces admin bottlenecks and keeps course content current.
Where do students access learning material in DreamClass?
Students access learning material from within their course view. As a result, they can see the latest files in the same place where they follow class activity.